Ok, so I built one of those beer can alcohol stoves backpackers carry, figuring its camping weather and all. I finish and give it a first try, and it worked! It worked a little too well I think. The quote user a penny as a pressure vent, like the weight on a pressure cooker. Check out what that penny turned into after the 5 minutes it burns for. I know you need to boil water then camping, but smelting metal?
By the way, 15 minutes later, its still too hot to touch.
Showing posts with label projects. Show all posts
11/24/2008
6/18/2006
Homemade dive camera

Ghetto fabulous camera and lighting rig. Go gorilla tape! Worked all the way down to 140 feet no problems.
9/14/2005
8/06/2005
Lathe? We dont need no steenkin' lathe!

All it took was a little creative tool use, oh, and willing suspension of the fear of losing an eye. I managed to coaxe these two beauties out of the piece of 1 inch thick acrylic I picked up last week from Farco Plastics. These will eventually be the cylinder end caps for my video camera housing. They look like they would stop a bullet, I'm pretty sure they will hold up deeper than I plan on diving. At least if I drown the camera will record it all the way to the bottom for later examination....
7/15/2005
Housing ready for final wet test
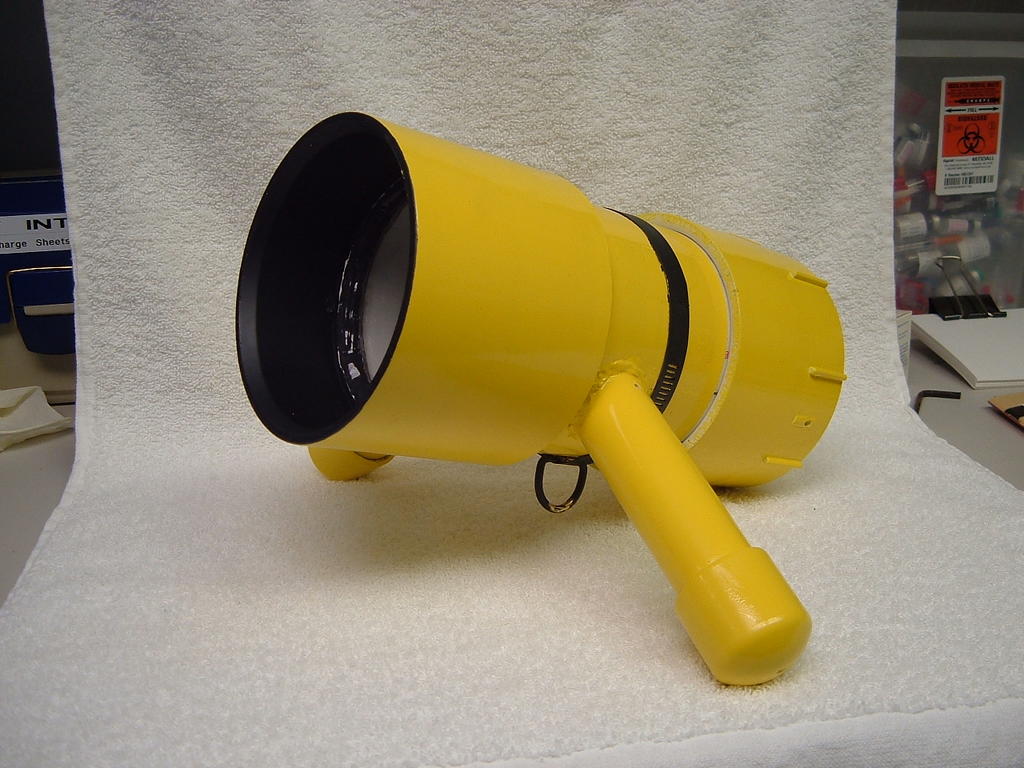
Here it is, painted up all pretty-like. The housing is finished, with a fresh coat of marine yellow, a retaining clip,and some ballast in the handles to make it float level. Tomorrow we are going to Ginnie Springs and I can test to see if it makes it to the 33 foot mark.
I found out today that Sony actually makes an 'official' housing for my camera, they want $280 for it and it only goes to 16 feet. and for another $700 you can get the light and mounting arm that go with it. Wow, what a deal, only $1000 to take a $400 camera down to 16 feet.
Mine costs about $25 so far and when I add one of Gibby's lights the total will still only be up to about $100.
Tomorrow is also the Dive-Rite tryout day at Ginnie, where you get to mess around with all the cool new gear. I dont think I'll get to do any of that since we're gonna be tubing not diving or snorkling.
7/12/2005
It works! Down to 8.5 feet at least.

The second attempt at the Low Income Housing Project has succeeded. Today I was able to wet test the housing with the camera in it. Of course I checked it well without the camera first. Absolutely no leaks, and the housing was opened and closed twice during testing so the seal is repeatable. So far I have only tested in the pool so the maximum depth rating at this point is 8.5 feet.
Lets call it the LIH85 for now, 85 sounds better than 8.5 dont you think? If it makes it to 33 feet it gets to be the LIH330
More to come . . .
7/10/2005
Low income housing project floods..

This is what I get for rushing something. Instead of using UHU or aquarium sealant on the front window of the housing, I used 60 second epoxy. Why? Because I couldnt wait to get in the pool and test it out today. Where did that get me? Nowhere.
I put it in the water and was happy to see it float nicely and seemed to be sealed up real tight. The part I was most concerned about, the test plug, was holding just fine. So I put on my mask and snorkel and took the housing down to 8 feet. Well about 6 feet down I saw it, a thin line of water running down the front window. By the time I got to the bottom of the pool, there was 2 inches of water in the housing. So much for that.
Back home I go to try another solvent-weld type of adhesive. More in days to come.
7/09/2005
Low income housing, part I

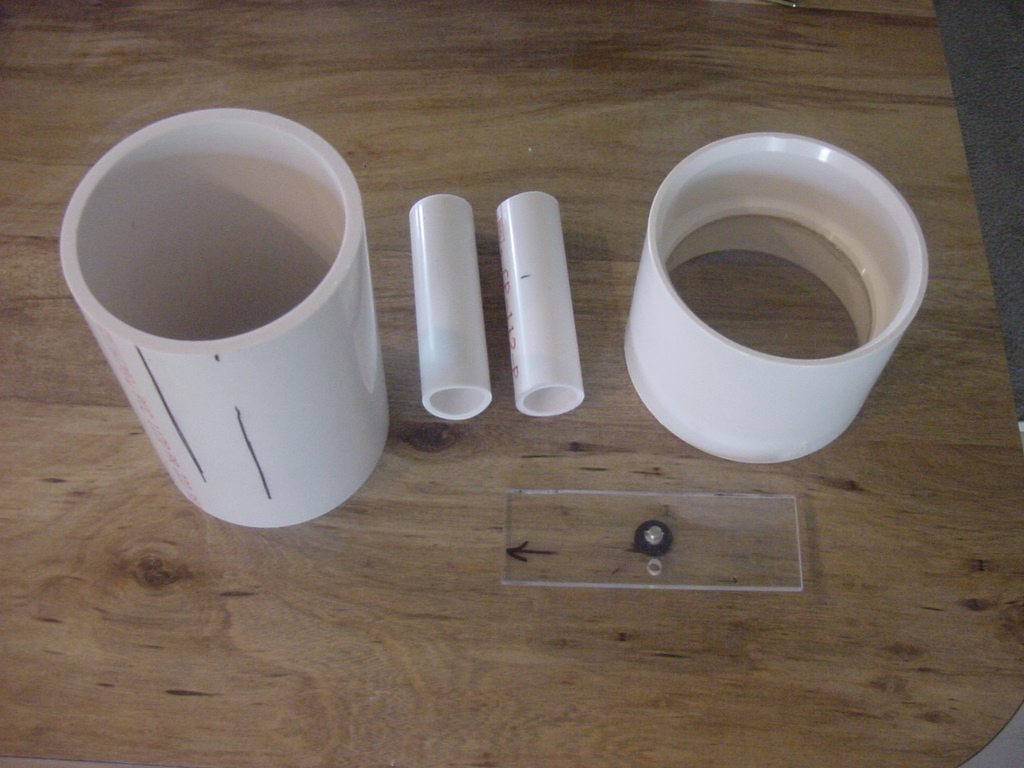
I finally got the parts together to get started on my underwater video housing. Until I can part with enough cash to buy the fancy clear acrylic tube, I will be using regular 4 inch PVC water pipe. Here are the basic components waiting to be assembled. More on this after I put it together, when its done I will include a detailed version of the assembly process.
Subscribe to:
Posts (Atom)